

Approx. read time: 18.6 min.
Post: Basic PowerShell commands that every Windows 10 user should know
 Make your Chromebook or Google Chrome run super faster
🔧 Basic PowerShell Commands Every Windows 10 User Should Know
PowerShell is a command-line shell and scripting language built into Windows. It's especially useful when the graphical interface isn't responsive or when you need to automate repetitive tasks.
Before using PowerShell scripts, it's wise to create a System Restore Point in case something goes wrong.
⚙️ 1. Launch a UWP App (Universal Windows Platform)
Modern Windows apps—like Settings, Calculator, Mail, or Photos—can be launched directly from PowerShell using URI (Uniform Resource Identifier) commands. This makes it fast and efficient to open specific parts of Windows without navigating menus or clicking through settings.
The command format is:
✅ Example:
This opens the main Windows Settings window, just as if you'd clicked it from the Start menu.
🧭 Launch Specific Settings Pages
You can also launch specific sections within Settings using more targeted URIs. Here are some examples:
| Task | Command |
|---|---|
| Open Network & Internet settings | Start-Process "ms-settings:network" |
| Open Display settings | Start-Process "ms-settings:display" |
| Open Windows Update | Start-Process "ms-settings:windowsupdate" |
| Open Privacy settings | Start-Process "ms-settings:privacy" |
| Open Apps & Features | Start-Process "ms-settings:appsfeatures" |
This is particularly useful for scripting automation, troubleshooting, or building lightweight support tools.
📦 Launch Other Built-In UWP Apps
UWP URIs aren't limited to system settings. You can also launch built-in apps like:
Each of these opens the corresponding app instantly from PowerShell.
🔍 Find More UWP URIs
Microsoft provides a comprehensive list of UWP URI schemes that can be used for launching different parts of Windows. Bookmark it as a reference if you're doing frequent automation or creating scripts for end-user support.
🛠 Pro Tip
Combine this with a desktop shortcut or scheduled task to build quick-launch tools or automate workflows for non-technical users.
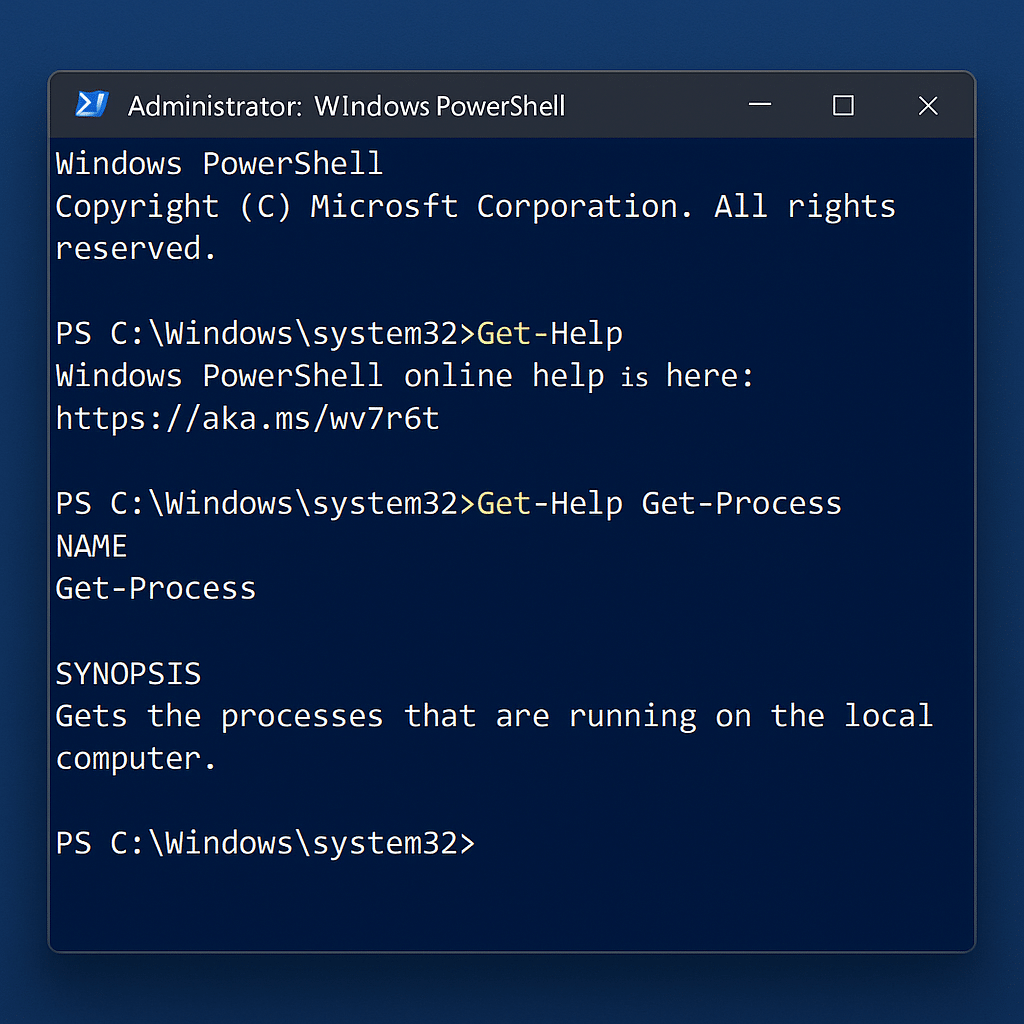
📖 2. Get Help for Any PowerShell Command
One of PowerShell's most underrated superpowers is its built-in documentation system. You don't need to memorize every command—instead, you can learn as you go using the Get-Help cmdlet.
The Get-Help command is your built-in manual for PowerShell. It shows you what a command does, what parameters it accepts, and how to use it correctly—all without leaving your terminal.
🛠 Basic Usage
This shows general usage instructions for Get-Help itself, including how to look up help for other commands.
🔍 Learn What a Specific Cmdlet Does
This gives you a summary of what Get-Process does, including a short description, syntax, and parameter list.
📚 View the Full Help Documentation
This expands the help output to include detailed descriptions, parameter explanations, input/output types, and notes. It's the equivalent of reading the manual page (man page) for a Linux command.
💡 See Practical Usage Examples
This shows real, practical examples of how to use the command in everyday scenarios. It's a great place to learn by doing.
🧠 Explore Everything Available
This returns a list of all help topics and available commands currently installed. It's a great way to discover new tools and explore what PowerShell can do.
🔄 Keep Help Files Up to Date
By default, PowerShell doesn't include the complete help files. To download the latest, use:
This ensures Get-Help pulls in the most current and complete documentation for all installed modules and commands.
📌 Pro Tip
If you're ever unsure:
-
What a command does
-
What parameters it needs
-
What results it returns
Just run Get-Help to see real-world usage in seconds.
PowerShell's help system makes it nearly self-teaching. With Get-Help, the terminal isn't a black box—it's a step-by-step guide.
🔍 3. Discover Commands with Get-Command
When you're new to PowerShell—or even when you're experienced—it's easy to forget the exact name of a command. That's where Get-Command comes in. Think of it as PowerShell's built-in search engine for finding available commands, functions, scripts, aliases, and executables.
The general format:
You can use it to explore, search, and filter available tools on your system.
🧠 Find Commands by Name
This searches for any command that includes the word "service" in its name. The asterisks (*) are wildcards that tell PowerShell to match anything before or after the word.
📌 Example Output Might Include:
-
Get-Service -
Start-Service -
Stop-Service -
Restart-Service
This is perfect when you remember part of a command but not the full name.
🎯 Filter by Command Type
This filters results to show only cmdlets, which are PowerShell-native commands (not external programs or scripts). Cmdlets follow the standard Verb-Noun naming pattern, like Get-Item, Remove-Item, or Start-Process.
You can also filter by other types:
-
Function -
Alias -
Script -
Application
📌 Example:
Shows you all executable programs (.exe) available in your system PATH.
⚒️ Combine Filters for Precision
This returns only PowerShell cmdlets with "item" in the name, such as:
-
Get-Item -
Copy-Item -
Remove-Item -
Rename-Item
🧰 Discover Aliases
PowerShell supports aliases—shortcuts for longer commands.
This helps you learn, for example:
-
ls=Get-ChildItem -
gc=Get-Content -
rm=Remove-Item
🚀 Pro Tip
Want to quickly figure out what command is running behind an alias?
This will show you that ls is actually an alias for Get-ChildItem.
With Get-Command, you're never stuck guessing. It turns PowerShell from a mystery into a searchable, self-documenting toolkit.
📂 4. Find a Specific File or Folder with Get-Item
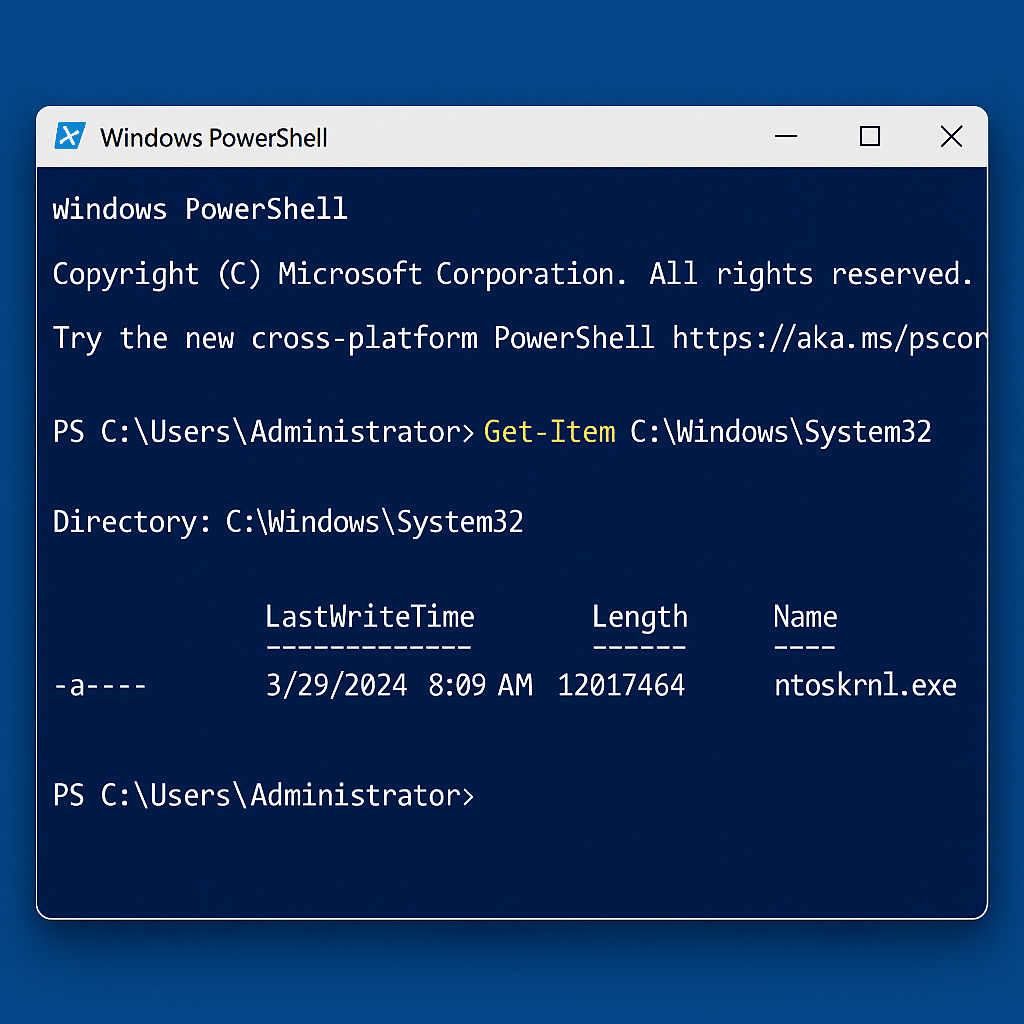
Need to inspect a specific file or directory? Use Get-Item—a straightforward PowerShell cmdlet that retrieves detailed information about a single item, whether it's a file, folder, symbolic link, registry key, or even a certificate.
🔧 Basic Syntax
This returns a PowerShell object representing the item at the specified location, with rich metadata like file size, attributes, timestamps, and more.
🧪 Example: Inspect a System Folder
This displays:
-
Mode (e.g.,
d-----for directories) -
LastWriteTime
-
Length (if it's a file)
-
Name
📌 Example Output:
📄 Example: Inspect a File
This provides data like:
-
File size
-
Creation and last modified date
-
File name and full path
-
Read-only or hidden attributes
🌐 Environment Variables for Flexibility
You can use environment variables to make scripts more portable:
This ensures it works regardless of whether Windows is installed on C:, D:, or another drive.
💡 Bonus: Use It with Wildcards (Cautiously)
This only returns the first match because Get-Item is designed for single items. If you want multiple matches, use Get-ChildItem instead:
🧰 Use Cases
-
Check if a file exists
-
Read file/folder metadata
-
Validate a path in a script
-
Pass the object to other cmdlets (e.g., Move-Item, Copy-Item)
🚀 Pro Tip
Combine with Test-Path to check before retrieving:
Get-Item is your go-to tool for pinpointing and inspecting a specific file or folder, making it essential for scripting, debugging, and system auditing.
📄 5. Read File Contents with Get-Content
Need to read the contents of a file—like logs, config files, or scripts—without opening a text editor? Get-Content is the PowerShell command for that. It outputs file contents line by line, directly in the terminal.
🔧 Basic Syntax
It reads and displays the file content as an array of strings (each line is a separate element).
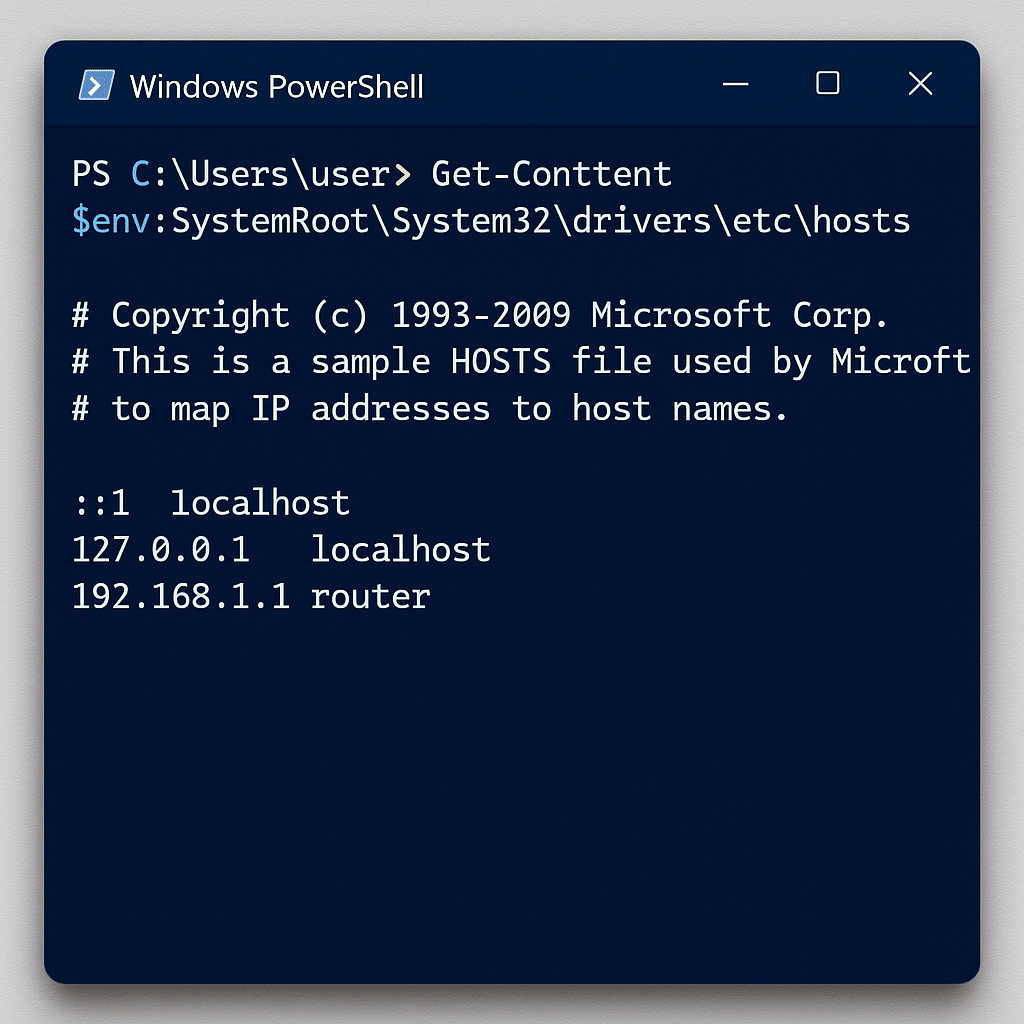
🧪 Example: View the Windows Hosts File
This reads the contents of the hosts file, which maps hostnames to IP addresses. It's commonly used for testing websites or blocking domains.
📌 Why use $env:SystemRoot?
Instead of hardcoding:
You use:
This dynamically references the Windows directory, which makes your script portable and OS-agnostic—perfect for environments where Windows may be installed on D:, E:, or elsewhere.
🔍 Sample Output
Every line is shown exactly as it appears in the file, making it easy to verify configurations or parse specific entries.
🛠 Practical Uses
-
✅ View configuration files (
.ini,.conf,.json) -
✅ Read log files to troubleshoot issues
-
✅ Pipe into
Select-Stringto search for keywords -
✅ Use in scripts to extract specific values
🔗 Combine with Other Cmdlets
Want to find a specific line or keyword?
This searches the file for any line containing "localhost"—very handy when dealing with large logs.
🚀 Pro Tip: Tail a File (Live Log Monitoring)
Want to watch new lines as they're added (like tail -f in Linux)?
This will continue streaming new content as the file updates—perfect for monitoring logs in real time.
Get-Content is your go-to for reading and analyzing text-based files directly from the command line—efficient, flexible, and script-friendly.
🛠️ 6. Manage Services with PowerShell
Windows services are background processes that run independently of user interaction. Think of them as the invisible workhorses of your operating system—handling tasks like updates, printing, networking, and system security. PowerShell gives you full control to view, start, stop, pause, or restart these services with simple, scriptable commands.
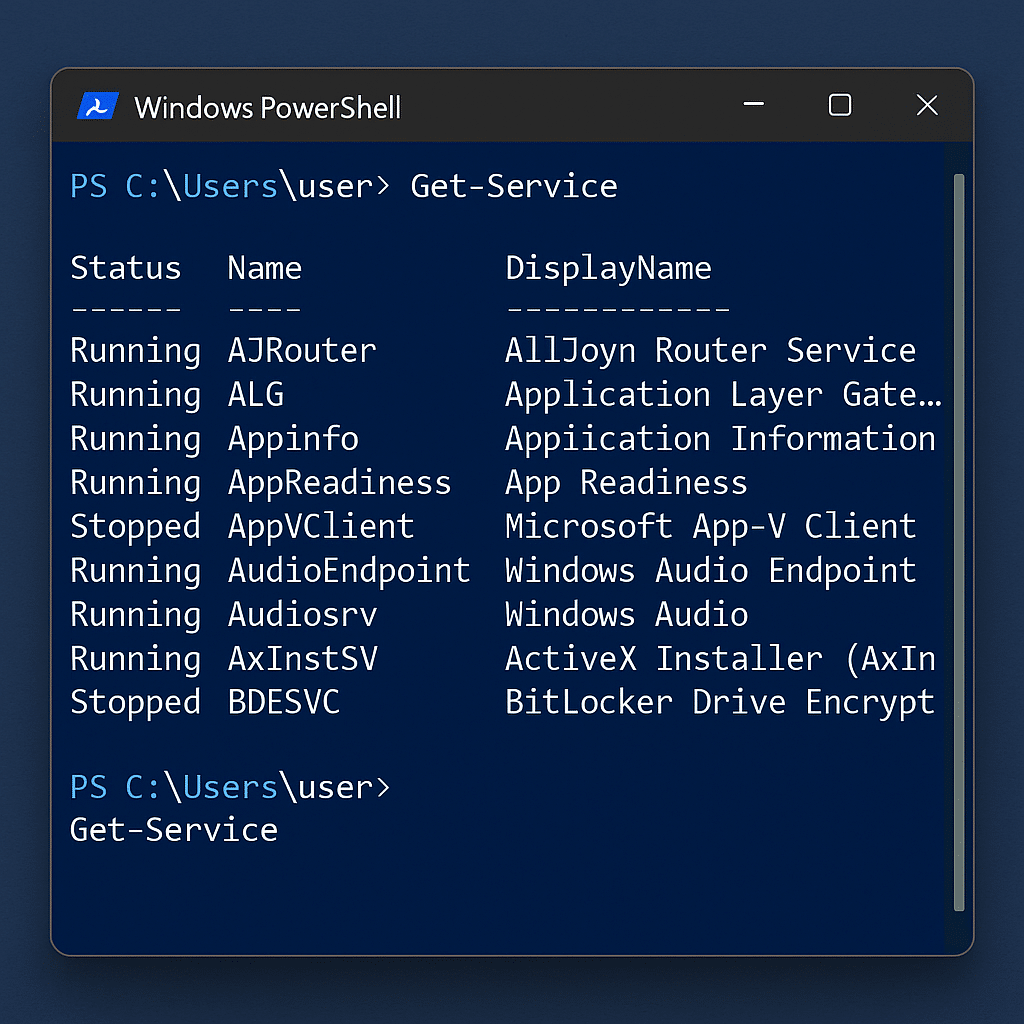
📋 View All Services
This command lists all services installed on the system—whether they're running, stopped, or paused.
📌 Example output:
You'll see the status (Running or Stopped), the service name, and its friendly display name.
▶️ Start a Service
This starts the Windows Update Service, which may have been disabled or stopped due to troubleshooting or system configuration.
⏹ Stop a Service
This stops the update service. Useful if updates are interfering with another process, or if you're doing system maintenance.
🔁 Restart a Service
This command is especially handy when a service is misbehaving and needs a soft reset.
🔧 Use Case: Troubleshooting Windows Update
If updates are stuck or failing, one quick troubleshooting step is:
You can also combine this with stopping bits (Background Intelligent Transfer Service):
🧰 Check a Specific Service’s Status
Shows the current state of the Print Spooler service—helpful when dealing with printing issues.
🚀 Bonus: Manage Multiple Services at Once
Want to restart multiple services in one go?
This restarts Windows Update, BITS, and Cryptographic Services in a single line—very useful for update repair scripts.
PowerShell gives you full visibility and control over Windows services, turning time-consuming troubleshooting into quick, repeatable steps.
🧠 7. Monitor and Control Processes in PowerShell
Processes are programs actively running on your computer—whether visible like Chrome and Notepad, or background tasks like system services. PowerShell allows you to manage these processes just like Task Manager—but with precision, automation, and scripting power.
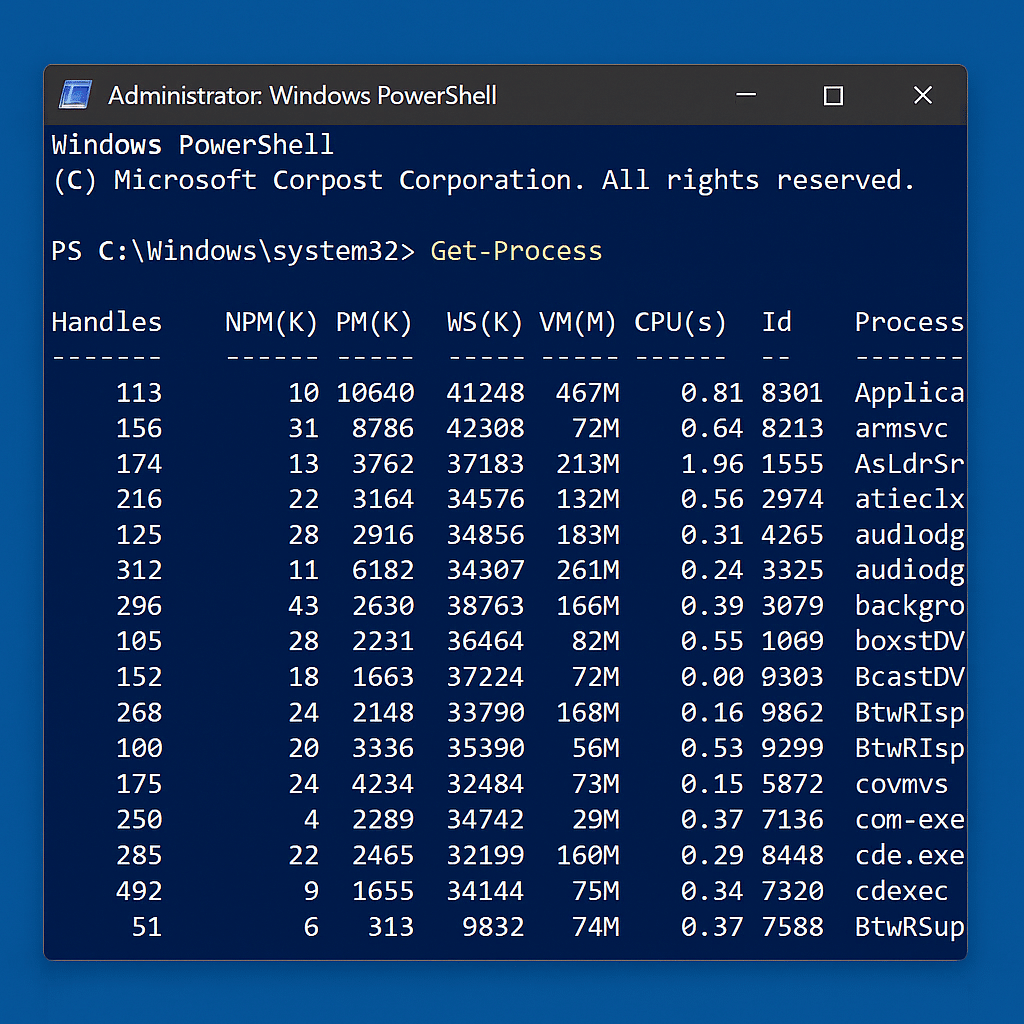
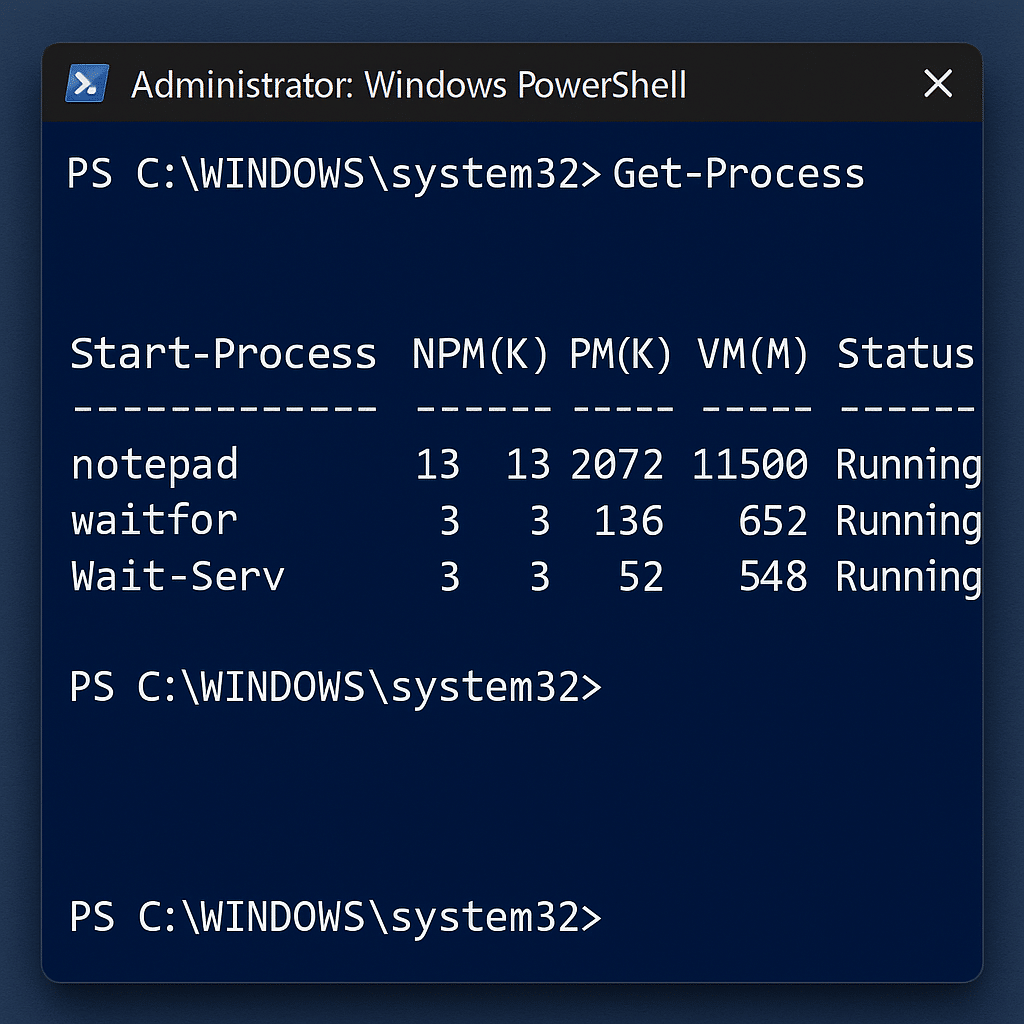
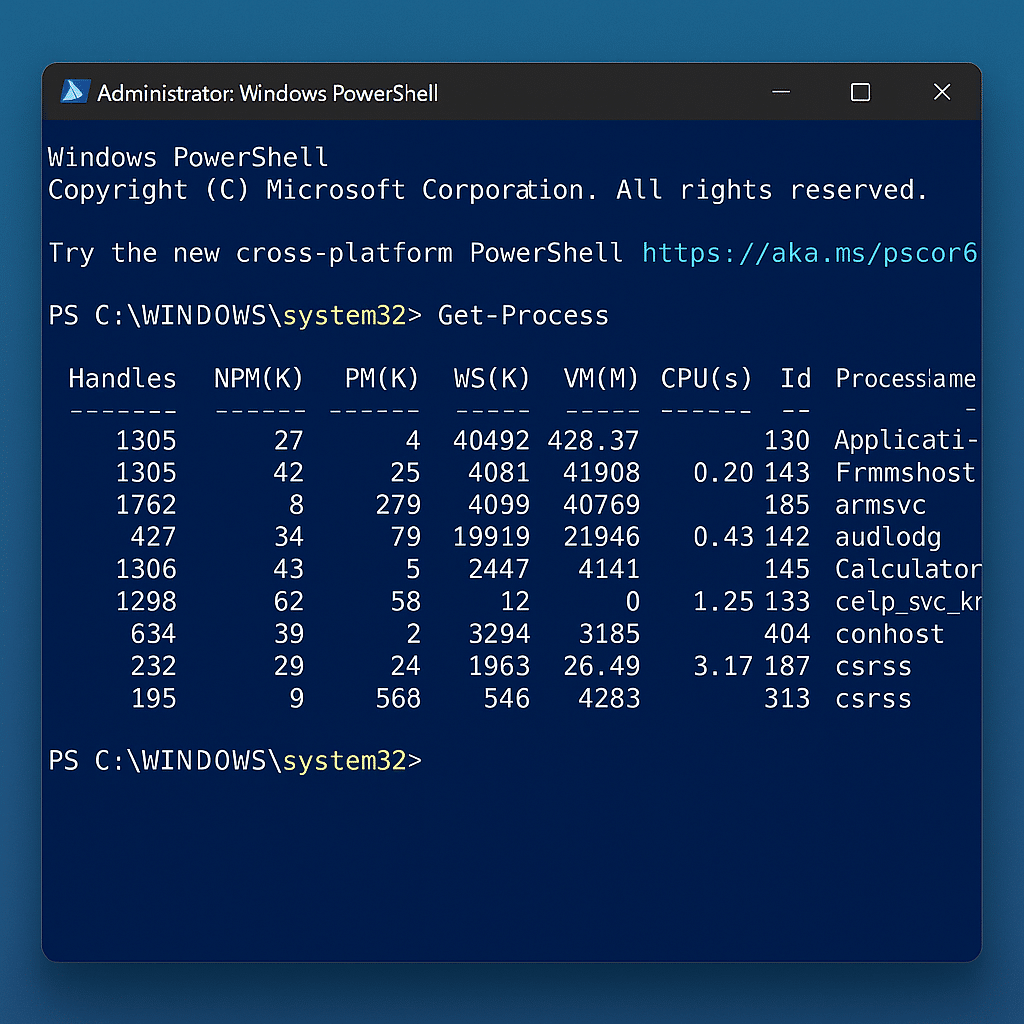
📋 View Running Processes
This lists all running processes, with useful details like:
-
ProcessName – Name of the process
-
Id – Unique process ID (PID)
-
CPU – Amount of CPU time used
-
WorkingSet (Memory) – RAM usage in bytes
📌 Example output:
This lets you monitor what's running and how much system resources it's using—just like Task Manager, but in command form.
▶️ Start a Process (Open a Program)
This launches Notepad. You can use this to open:
-
Applications:
Start-Process "calc" -
URLs:
Start-Process "https://example.com" -
Files with default apps:
Start-Process "C:Docsreadme.pdf"
⏹ Stop a Process (Force Close)
This forcefully closes any running Notepad windows. You can also use:
That targets the process using its Process ID (useful when multiple instances are running).
⚠️ Be careful—Stop-Process does not prompt for confirmation. Any unsaved work in the process will be lost.
🔍 Target a Specific Process
This filters the list to show only Chrome-related processes. Great for diagnostics or cleanup scripts.
🚀 Bonus: Kill Multiple Processes at Once
This shuts down Notepad and Calculator if they're running—useful for locking down machines or cleaning up user sessions.
🛠 Use Cases
-
Quickly close frozen apps
-
Monitor memory usage of long-running processes
-
Launch tools or URLs during automated scripts
-
Kill CPU-hogging apps during maintenance
PowerShell gives you the same visibility as Task Manager—but adds speed, repeatability, and automation. Whether you're fixing a hang, launching tools, or writing custom workflows, Get-Process, Start-Process, and Stop-Process are essential tools in your kit.
🔐 8. Set Script Execution Policy in PowerShell
PowerShell includes built-in security mechanisms to prevent unauthorized or unsafe scripts from running on your system. This is where Execution Policies come into play. They control how and whether PowerShell runs scripts based on their origin and digital signature.
By default, PowerShell's policy is restrictive—and for good reason. But if you're writing or using custom scripts, you may need to loosen it slightly.
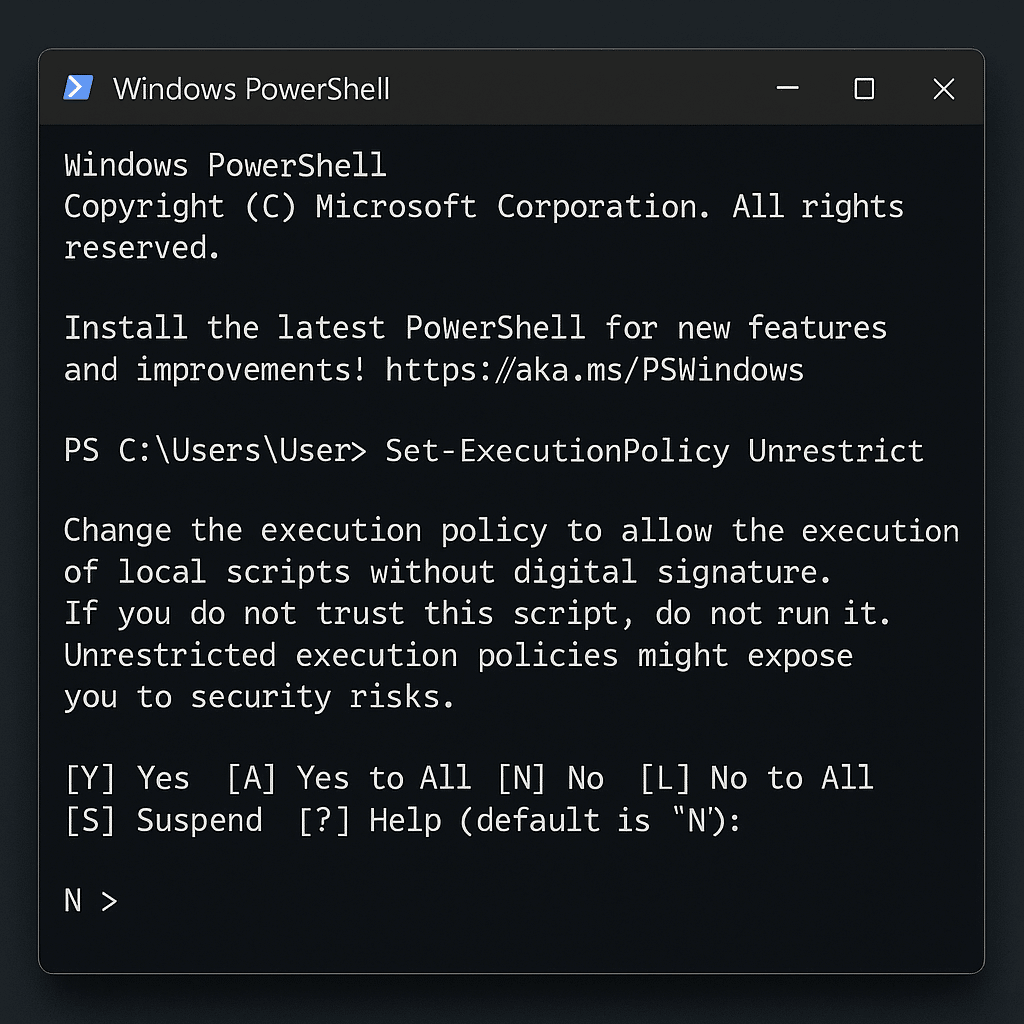
⚙️ Change the Execution Policy
This command sets the policy to allow local scripts to run while still blocking unsigned scripts from the internet or email attachments.
You'll usually see a prompt:
🔐 Execution Policy Options Explained
| Policy Name | Description |
|---|---|
| Restricted (Default) | No scripts allowed. Only interactive commands can run. |
| RemoteSigned | Local scripts can run. Scripts from the internet must be digitally signed. |
| AllSigned | Every script (local or remote) must be signed by a trusted publisher. |
| Unrestricted | All scripts can run, including unsigned ones. You'll still see a warning for remote files. |
🧠 Example Use Case
You've written a PowerShell script (backup.ps1) to automate file backups, but PowerShell throws this error:
To fix this:
Now local scripts like backup.ps1 will run without error.
🔒 Important Notes
-
Execution policy is not a security boundary—it's a convenience feature to prevent accidental script execution.
-
You can scope the policy to specific levels:
This applies only to the current user, not system-wide—useful if you don't have admin rights.
-
You can bypass the policy for a single session without changing settings:
⚠️ Use With Caution
Setting your policy to Unrestricted or Bypass can expose your system to malicious scripts, especially from email or untrusted downloads.
Stick with RemoteSigned or AllSigned for most real-world use unless you really know what you're doing.
🔍 Check Current Execution Policy
Or for all scopes:
PowerShell's execution policy system strikes a balance between security and flexibility—but you're in the driver's seat. Set it wisely depending on your workflow, and always test scripts from trusted sources.
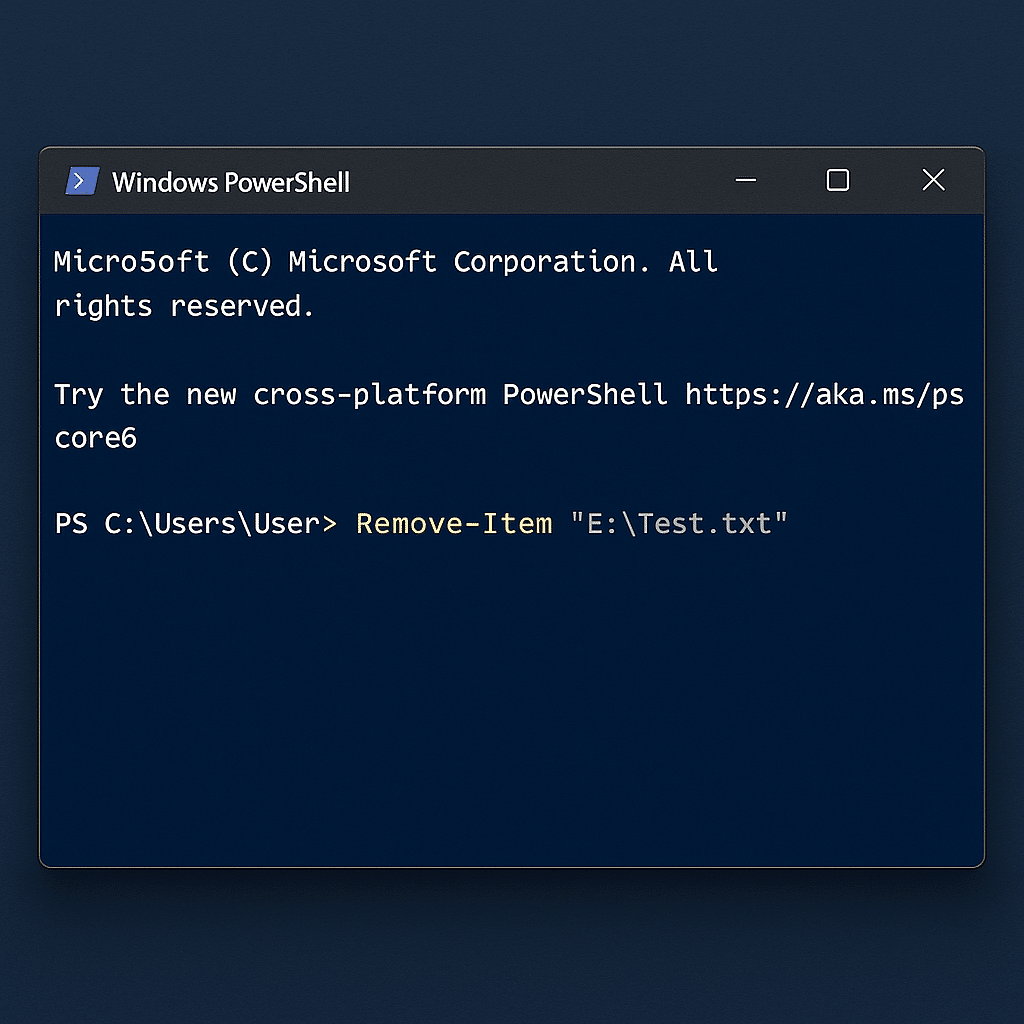
❌ 10. Delete Files or Folders with Remove-Item
Need to clean up temp files, delete outdated logs, or remove unwanted folders? PowerShell's Remove-Item command gives you powerful control to delete files and directories—but with that power comes risk. Used carefully, it's an essential tool for system maintenance and automation.
🗑️ Delete a File
This removes the specified file immediately—no confirmation prompt, no Recycle Bin. Once it's gone, it's gone.
📁 Delete a Folder
-
The
-Recurseflag is required to delete a folder and all its contents (files and subfolders). -
Without
-Recurse, PowerShell won't delete directories that aren't empty.
⚠️ Preview Deletions Safely
Before running any real deletion command, always test with -WhatIf:
This simulates the action and shows you what would be deleted—without actually doing it.
📌 Example output:
This is your safety net, especially when scripting destructive actions.
🧠 Delete Multiple Files
You can use wildcards to delete batches of files:
Or filter specific ones:
This will preview deletion of all .txt files starting with "log".
🔐 Delete Hidden or Read-Only Files
To remove protected or read-only files, use -Force:
Only use this when absolutely sure—you're bypassing file protections.
🛡 Best Practices for Safe Deletion
| Tip | Why It Matters |
|---|---|
Use -WhatIf |
Prevents accidental data loss |
| Double-check paths | Avoid targeting the wrong directory |
Use -Recurse with caution |
Deletes everything under the path |
Add -Force only when needed |
Bypasses safeguards—don't overuse it |
🚀 Automate Cleanup Tasks
You can combine Remove-Item with scheduled tasks or scripts to clear temp files daily:
This deletes .log files older than 7 days—great for keeping your system lean.
Remove-Item is one of the most powerful and dangerous tools in PowerShell. Used wisely, it streamlines cleanup and scripting. Used carelessly, it's irreversible. Always preview, double-check, and script defensively.
📺 Beginner-Friendly Video
Watch this beginner tutorial on PowerShell:
📹 Windows PowerShell/Command Line for Beginners (YouTube)
🧠 Summary Table
| Task | Command Example |
|---|---|
| Open Settings | Start-Process "ms-settings:" |
| Get help | Get-Help Get-Process |
| Find commands | Get-Command -Name *file* |
| Read file | Get-Content "C:file.txt" |
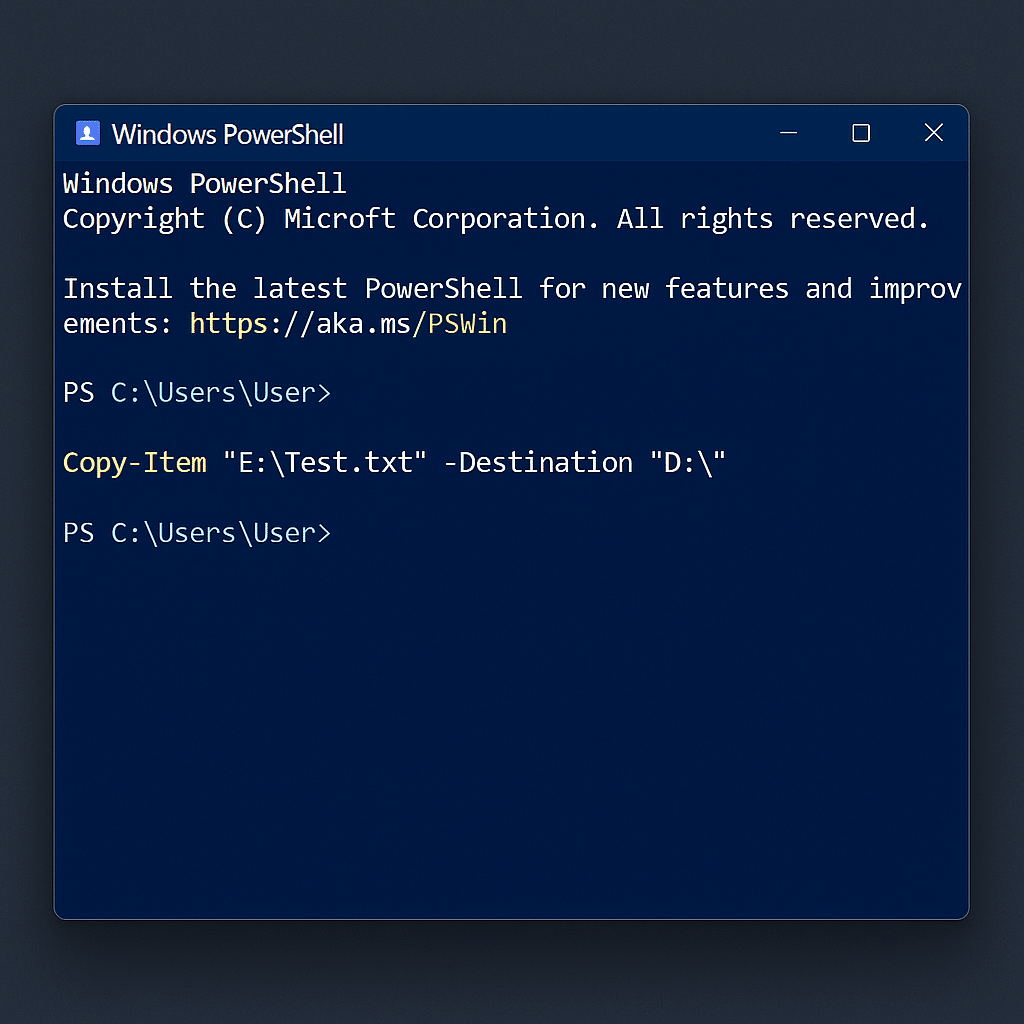
| Copy file/folder | Copy-Item "C:file.txt" -Destination "D:" |
| Delete file/folder | Remove-Item "C:file.txt" |
| View running processes | Get-Process |
| Start/Stop services | Start-Service "wuauserv" |
| Set script policy | Set-ExecutionPolicy RemoteSigned |
| Search text in files | Select-String -Path *.log -Pattern "error" |
🔚 Final Thoughts
PowerShell isn't just for IT pros—it's a powerful tool every Windows 10 user can learn to leverage. With just a handful of commands, you can take control of your system: launch apps, manage processes, manipulate files, automate tasks, and even override security policies (carefully, of course).
The commands we've covered—like Get-Help, Get-Process, Copy-Item, and Set-ExecutionPolicy—offer a strong foundation. As you grow more comfortable, you'll realize PowerShell is less about memorizing scripts and more about thinking like a problem-solver.
Remember:
🛠 Start small.
🧠 Use Get-Help often.
⚠️ Always test before automating.
With these essentials in your toolkit, you're no longer just a user—you're a power user.
Related Videos:

Related Posts:
Make your Chromebook or Google Chrome run super faster


