

Approx. read time: 25 min.
Post: WiFi Password Hacking for Beginners
WiFi Password Hacking for Beginners. First from the legal department: Below, inside the toggle is the MiltonMarketing.com disclaimer. Please expand the toggle, read it along with our privacy policy located here. If you continue to use our website/services that means you have read, and agree to our disclaimer and policies.
1) Setting up the lab (Wi-Fi Security Testing for Beginners)
Legal note: Only test networks you own or have explicit written permission to assess. This lab is for ethical security work—full stop.
Choose the right platform
BackTrack is long retired. Use Kali Linux, a security-focused distribution maintained by Offensive Security, with hundreds of assessment tools preinstalled and curated for penetration testing workflows. Kali Linux
Run Kali in a virtual machine (recommended)
Virtualization keeps your host clean and lets you snapshot, roll back, and isolate tests.
-
Hypervisor: Oracle VirtualBox is free and cross-platform; install the base package, then its matching Extension Pack (for USB 2/3, NVMe, etc.). Get both from the official VirtualBox download page. virtualbox.org+1
-
Prebuilt image: Download the official Kali VirtualBox image and verify its checksum. This is faster and safer than installing from ISO. Default credentials on prebuilt images are kali / kali (Kali moved away from the old
root/toormodel years ago). Kali Linux+2Kali Linux+2
Importing Kali into VirtualBox
-
Download the Kali VirtualBox archive from the official site.
-
Extract the
.7zand Add the VM (select the provided.vboxfile) in VirtualBox. (Older builds used.ova; current guides show adding the.vboxafter extraction.) Kali Linux -
Before first boot, open Settings:
-
System → Motherboard: Allocate RAM responsibly. Kali is comfortable at 2–4 GB for basic labs; give more if you’ll be running heavier tools.
-
System → Processor: 2 vCPUs is a good starting point; enable PAE/NX.
-
Display: Bump video memory to 64–128 MB for smoother UI.
-
Storage: Ensure the virtual disk is on a fast SSD if possible.
-
Networking setup (read this carefully)
What you pick here determines what is and isn’t possible inside the VM.
-
NAT: Safest/easiest for Internet access. Good for tool installs/updates.
-
Bridged Adapter: Places the VM on your LAN like a real machine (useful for some discovery scenarios). However, bridging does not make your VM “speak Wi-Fi”—to Kali it still looks like Ethernet. You can’t do monitor mode/packet injection through a bridged host Wi-Fi card.
-
USB Wi-Fi (for wireless testing): If you plan to practice legitimate Wi-Fi auditing, use a USB wireless adapter that supports monitor mode/packet injection and pass it through to the VM via USB settings/filters (requires Extension Pack). This gives Kali direct control of the radio. VirtualBox Forums
Quick rule: Bridged for general network presence; USB passthrough for actual 802.11 work.
First boot + credentials
Start the VM. On current prebuilt images the default user is kali with password kali. Kali switched to a non-root default in 2020; if you install from ISO you’ll create your own user during setup. Plan to change the password immediately after login. Kali Linux+1
Pro tips (still in scope)
-
Snapshots: Take one right after first boot/updates so you can safely experiment and roll back.
-
Guest Additions: Optional but helpful for shared clipboard/drag-and-drop; ensure versions match your VirtualBox build. virtualbox.org
-
Apple Silicon note: If you’re on ARM-based Macs, use ARM-compatible hypervisors/images. (Prebuilt VirtualBox images are typically amd64; check Kali’s “Get Kali” page for current VM/architecture details.)
Opening the Terminal & First-Hour Hardening
Ethical reminder: everything here is for lawful testing on networks you own or have explicit written permission to assess.
Open the Terminal
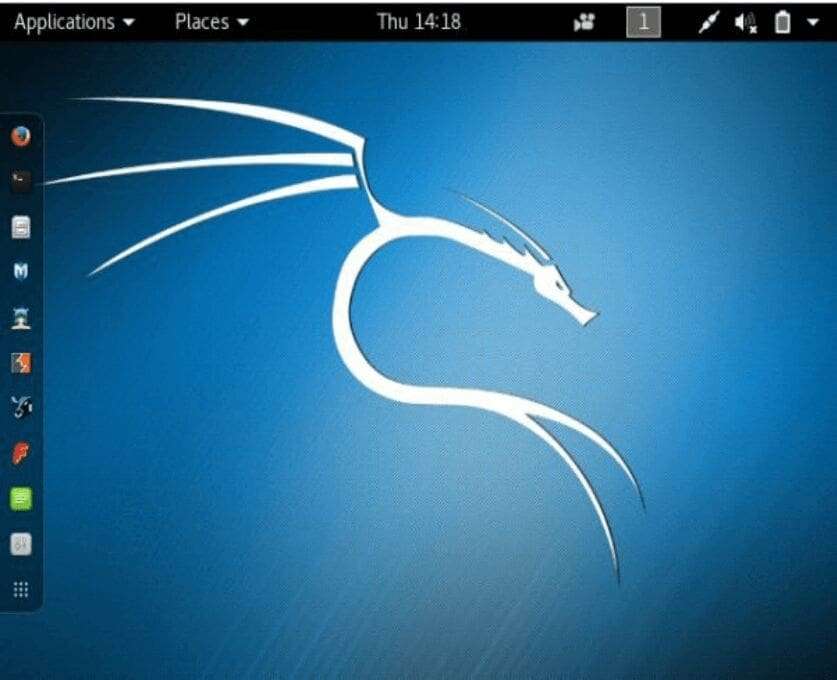
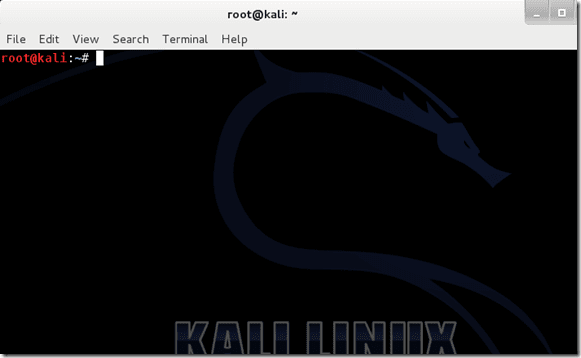
In Kali’s desktop, launch Terminal (look for the black >_ icon in the dock/menu; you can also right-click the desktop → Open Terminal). You’ll see a shell prompt similar to:
kali@kali:~$
That trailing $ indicates a regular user session. A # indicates a root (superuser) shell.
“Root” vs “Administrator”
If you’re coming from Windows, think of root as beyond Administrator. Root can do anything the OS permits—no guardrails. Modern Kali images log you in as a non-root user by default for safety; you elevate temporarily with sudo.
- Regular user prompt:
$ - Root prompt:
# - Temporary elevation:
sudo - Root shell (if/when truly needed):
sudo -i
Update the System (First!)
Before installing tools, sync package metadata and apply updates:
sudo apt update
sudo apt full-upgrade -y
apt updaterefreshes the package index.apt full-upgradeinstalls updates and handles any dependency changes cleanly.
(If you prefer the older syntax,apt-get update && apt-get dist-upgrade -yis equivalent.)
When it finishes, reboot (inside the VM) if the upgrade prompts you to.
Change Default Credentials
Never keep defaults. Change the current user’s password immediately:
passwd
Follow the prompts to set a strong passphrase.
If you imported a very old image that still boots straight into root, first set a password for that account with
passwdand then create a non-root user for daily work. In all cases, prefersudoover staying in a permanent root shell.
Cleanly Power Off the VM
Don’t just close the window. Shut down properly to avoid filesystem corruption:
- In Kali: Power Off from the system menu, or
- In VirtualBox: Machine → ACPI Shutdown, or
- From the terminal:
sudo poweroff
That’s it—Terminal is open, you understand privilege levels, your box is patched, and your credentials are secured. Next sections can build on this safe baseline.
2) Hide Identity and Become Untraceable. (WiFi Password Hacking for Beginners)
In hacking, it is very important to be untraceable. To be able to hack is meaningless without hiding your identity. For example, imagine that you hacked someone’s wifi without hiding your identity. In a few days, authorities can analyze the wifi router, find your (the hacker’s) computer information, and finally, they will find you and throw you into jail with a 7-foot cellmate named Tiny asking you if you like extra mayo or what your cell number is:

It is crucial to hide your identity and make the hack untraceable. In this section, you will learn about how to be anonymous, hide your identity, and how to become fully untraceable.
Note: It goes without saying, you are breaking into your own home WiFi network and not your nieghbors. :-)
What is a MAC address? – wifi password hacking
A MAC address (media access control address) is a unique identifier assigned to NICs (Network Interface Cards) for communications on the physical network segment. Every computer device has a different MAC address. The MAC address is a built-in (hard-coded) address put into a device when it is created. When your computer starts, The Operating system reads from the hardware device the hard-coded MAC address and places it into memory (RAM). When you are connected to the wireless network, it sends packets to you and then your computer converts this information to websites, movies, music, images, etc…
Imagine that two computers are connected to the wireless network, the first computer wants the website google.com, and the second computer wants amazon.com. The network sends packets to these computers, but how do these computers know what packets to ignore and what packets to receive?
Computers identify packets to receive or ignore by MAC address when the network is sending a packet to a computer, it also writes in the packet the MAC address of the computer it is sending the packet too. That is the way wireless networks and computers are connecting with each other in a nutshell. So, if you do not change your IP and hack someones wireless network, you let them investigate your identity by analyzing the network history. See computer forensics.
How to hide your MAC address? – wifi password hacking
You may be thinking, how you can we change the MAC address if the computer reads it from hardware? You are not going to make modification on the hardware, you are going to change RAM (spoof a MAC address). Remember earlier we mentioned the MAC address is read from the hardware into memory (RAM).
When the computer starts, the MAC address loads in RAM and we are going to change already loaded MAC address from RAM. So, when you change your MAC address authorities will find your fake MAC address and they will not be able to trace hacker to a unique NIC (Network Interface Device). Now you have basic information about what is MAC address, dangers of hacking without changing MAC address, and how authorities can trace you. So how can we change our MAC address?
Change MAC address with Kali – wifi password hacking
Kali has already installed a program called “macchanger” which allows us to change the loaded MAC address in RAM. Remember the reason we choose Kali was because it was designed and includes tools for penetration testing.
Open VirtualBox, start the Kali virtual machine and open terminal. We need to stop our wireless card to change the MAC address. Type in “ifconfig wlan0 down”. The ifconfig is a program, wlan0 is our specific wireless card and the down is the action (or option of the ifconfig command) we want to do. This command will stop every wireless service for our specific network card wlan0 and it is necessary to stop the network card before changing the MAC address.
Then type in the following command “macchanger –help”. This command tells Kali to call macchanger and show help.
There are program usage instructions with the -help command. In my specific case, I will use a random MAC address by entering the following into terminal:
macchanger –random wlan0
macchanger is the program name –random is an option and wlan0 is the specific wireless card name. If everything is correct the screen should look like this:

MAC randomization: what you’re seeing — and why monitor mode comes next
When you run:
the output shows two key lines:
-
Permanent MAC — the burned-in hardware address (BIA) and its vendor OUI (the company name in brackets).
-
Current MAC — the randomized, locally administered address macchanger just set. Because it’s not a vendor OUI, you won’t see a manufacturer label next to it.
Root vs. regular user (quick refresher)
In Kali, a # prompt means root (unrestricted), while $ means a regular user. Modern images default to a non-root user; elevate with sudo when necessary.
What MAC randomization actually buys you
Changing your MAC can reduce passive tracking on local Wi-Fi segments and keep your card from advertising its real vendor identity. It does not make you invisible:
-
It helps at Layer 2 (link layer) only. Your traffic and behavior can still be profiled at higher layers (DHCP/HTTP/TLS fingerprints, timing, etc.).
-
Some networks log both the old and new addresses during re-association. If you change MAC while connected, expect drops or reauth prompts.
-
Using MAC spoofing to bypass access controls (e.g., MAC filters) on networks you don’t own or administer is unethical and illegal. Keep this strictly to your lab.
Bottom line: MAC randomization is privacy hygiene, not a magic cloak.
Not yet time to “start hacking”
You’re not ready yet because you haven’t learned monitor mode. For any legitimate Wi-Fi assessment in your lab, you need to understand how to switch a supported adapter from managed (normal client) to monitor (passively capture 802.11 frames) and what that enables. That’s exactly what we’ll cover next: what monitor mode is, when to use it, and how to operate it safely and legally inside Kali.
About proxies, VPNs, and “anonymity”
For basic lab hygiene, a reputable VPN can protect your traffic on untrusted networks. However, building “proxy chains/loops” with the goal of evading tracing crosses a legal line—I can’t help with that. Also, be realistic: no tool makes you “untraceable.” Focus on well-scoped, permissioned testing and solid operational security inside your own lab.
3) Wireless modes. (WiFi Password Hacking for Beginners)
What the “handshake” actually is (and why monitor mode matters)
Legal reminder: only capture traffic on networks you own or have explicit written permission to assess.
The handshake in plain English (but technically correct)
On WPA/WPA2-Personal networks, a client and the access point perform a 4-way handshake when the client connects. Those four EAPOL messages exchange nonces and derive session keys:
-
Inputs: the pre-shared key (PSK), the SSID (as the salt), and two nonces (ANonce from the AP, SNonce from the client), plus MAC addresses of both parties.
-
Outputs: a Pairwise Master Key (PMK) → Pairwise Transient Key (PTK) that secures unicast traffic. A Message Integrity Code (MIC) in the handshake proves both sides derived the same keys—without ever sending the password in the clear.
Because the PSK is never transmitted, offline guessing works by:
-
using the captured handshake + SSID to derive candidate keys, and
-
checking whether they produce a valid MIC. If not, try another candidate.
For WPA3-Personal (SAE), the handshake is different and designed to resist offline guessing; many legacy targets are still WPA2.
You must be in range to capture it
You’ll often hear “once you have the handshake you can work offline.” That’s true after capture—but you still must be within radio range to observe the handshake in the first place (it only occurs when a client connects or reconnects).
Managed vs. monitor mode
By default, your Wi-Fi adapter runs in managed mode: it sends/receives frames addressed to your device. To observe the handshake between other devices, you need a supported adapter in monitor mode so it can passively listen to 802.11 management and data frames on a chosen channel.
-
Managed mode: normal client behavior; you only see your own traffic.
-
Monitor mode: passive, channel-focused capture of over-the-air frames (subject to encryption and what’s actually being transmitted at that moment).
Tip: You’ll also want the BSSID (AP MAC) and channel to park on the correct frequency. Hopping blindly makes captures unreliable.
About MAC randomization in this context
Randomizing your MAC helps reduce local tracking of your device. It does not decrypt traffic, bypass authentication, or replace monitor mode. Think of it as privacy hygiene while you observe the air.
What you will (and won’t) do next
The next section will cover how to place a supported adapter into monitor mode and verify you’re listening on the correct channel—safely, legally, and inside your lab. We will not provide instructions to force client reconnects or to target networks you don’t own. Keep your assessments permissioned and documented.
Key takeaways
-
A “handshake” = the WPA/WPA2 4-way EAPOL exchange during client association.
-
You must capture it in range, then you can analyze offline.
-
Monitor mode is required to observe other clients’ handshakes; managed mode isn’t enough.
-
MAC randomization ≠ invisibility; it’s just basic privacy on the local link.

Enable monitor mode (the right way)
Use this only on hardware you own or have explicit written permission to test.
1) Find your wireless interface
Interface names aren’t always wlan0 anymore.
Pick the correct interface (e.g., wlan0, wlp2s0, etc.). In the commands below, replace wlan0 with yours.
2) Switch to monitor mode (modern ip/iw workflow)
(Optional) Park on a channel to avoid hopping:
If you insist on the legacy tools
iwconfig can display wireless params, but mode switching is better done with iw. If you just want to confirm:
3) Kali convenience: airmon-ng (alternative)
Aircrack-ng’s helper handles driver quirks and process cleanup.
Heads-up: killing NetworkManager/WPA supplicant will drop your host’s Wi-Fi until you stop monitor mode.
4) Revert to managed mode (when done)
Myth-busting (important)
-
“The Wi-Fi password is in the handshake.” Incorrect. The handshake never contains the plaintext password. It carries cryptographic material that lets you verify guesses offline.
-
“Once monitor mode is on, you can hack easily with a wordlist.” No. Legal, permissioned testing still requires proper methodology, hardware support, and ethics. Monitor mode simply lets your adapter observe 802.11 frames.
You’re now set up to observe the air responsibly. In the next section you can cover how to validate monitor mode is capturing what you expect (again, on your own lab network).
4) Catching the handshake (WiFi Password Hacking for Beginners)
Capturing the association handshake (responsible methodology)
Only capture on networks you own or have explicit written permission to assess. Disruptive tactics (e.g., forced deauthentication) are off-limits here.
What you’re trying to observe
Every time a client associates with a WPA/WPA2-Personal access point (AP), the two exchange a 4-way EAPOL handshake. If you passively record that exchange while parked on the AP’s channel, you can later verify password guesses offline against the capture. (The password itself is not inside the handshake.)
Tooling you’ll use
-
Monitor-mode adapter parked on the AP’s channel
-
A passive capture tool such as airodump-ng (preinstalled in Kali) or Wireshark/tcpdump with radiotap support
Two clean steps to capture (no disruption required)
1) Scope the target
Identify the BSSID (AP MAC) and channel of your own lab AP. You’ll lock your capture to that channel—channel-hopping is unreliable for catching complete handshakes.
2) Run a passive capture and wait for a legitimate association
Start airodump-ng (or your preferred sniffer) locked to the AP’s channel and writing to a capture file (PCAP). Then trigger a legitimate connect event on a device you control (e.g., “Forget network” → reconnect). This creates a real handshake without bothering anyone else.
-
In airodump-ng, the top-right banner will report
WPA handshake: <BSSID>once it sees a valid exchange. -
In Wireshark, use the display filter
eapoland look for the 4 EAPOL-Key messages with matching replay counters/MICs between your client and the AP.
Note: We’re not using deauthentication frames to force reconnects. It’s disruptive, often blocked by Protected Management Frames (802.11w), and not appropriate outside authorized test scopes.
Quality checks and tips
-
Channel discipline: Stay parked on the AP’s channel throughout the capture or you’ll miss frames 2–4.
-
Clock & notes: Set the VM clock correctly and add a short test log (time, AP name, client MAC) so you can correlate later.
-
File hygiene: Rotate PCAPs or set size limits so you don’t fill the disk during long passive runs.
Reality check
-
Myth: “The Wi-Fi password is contained in the handshake.”
Fact: The handshake contains cryptographic proofs, not the plaintext password. It allows offline verification of guesses only. -
Modern networks: WPA3-Personal (SAE) is designed to resist offline guessing. For defense, prefer WPA3/SAE, enable PMF (802.11w), disable WPS, and use long random PSKs or 802.1X (Enterprise).
Follow the above and, when your capture shows WPA handshake: <BSSID>, you’ve successfully recorded a legitimate association for analysis inside your lab—no disruption, no drama.

When you catch the handshake you are ready to actually crack the WiFi password. As mentioned previously the wifi password is stored in the handshake. :-)
5) Cracking any wireless network. (WiFi Password Hacking for Beginners)
After the handshake: what offline guessing really means (authorized audits only)
Scope check: Everything here applies to authorized security testing on networks you own or have explicit written permission to assess. No exceptions.
Handshake ≠ password
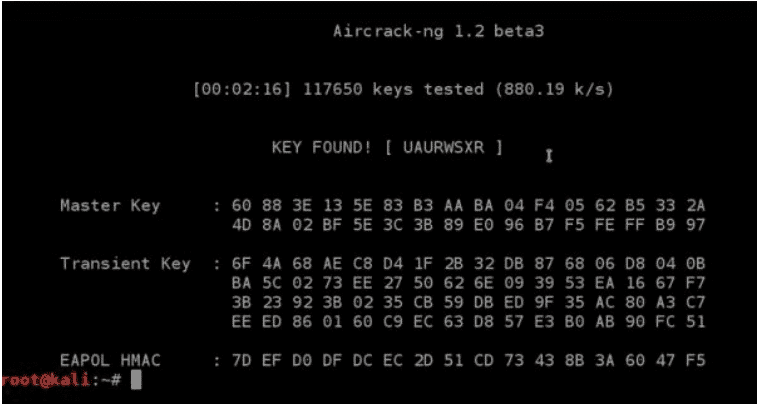
That capture you took contains the WPA/WPA2 4-way handshake, not the plaintext password. The handshake lets an auditor verify guesses offline—it does not reveal the key by itself.
Under WPA/WPA2-Personal, the candidate passphrase is combined with the SSID (as salt) via PBKDF2-HMAC-SHA1 (4,096 iterations) to derive the Pairwise Master Key (PMK). The PMK is then used to compute values that must match what appears in the handshake. If they match, your guess was right; if not, try another. That’s the entire “offline” game.
“Biggest wordlist” is usually a trap
Chasing the “largest wordlist on earth” sounds impressive. In practice:
-
Quality beats size. Curated, de-duplicated lists with rules (word mangling), masks (patterned guesses), and keyboards/locale awareness outperform bloated dumps full of noise.
-
Context matters. Human-chosen passphrases reflect language, culture, and site/user habits. Blindly throwing 10–15 GB at the problem wastes time and I/O.
-
WPA3 changes the equation. WPA3-Personal (SAE) is designed to resist offline guessing; moving your own network to WPA3 is the single best “post-handshake” defense.
What an authorized auditor actually does (high level)
-
Confirm capture quality. Validate a complete 4-way exchange (EAPOL frames 1–4) and correct channel/band.
-
Establish testing authority. Written permission, scope, and time window (yes, paperwork).
-
Use targeted candidates first. Organization policy phrases, seasonal patterns, SSID-influenced guesses, and length distributions—not “every word ever printed.”
-
Measure and report. If a guess succeeds, the finding is about policy and strength, not “gotcha.” Remediate with stronger controls.
Defensive takeaways for network owners
-
Length kills guesses. Use 16+ character random passphrases (or four-to-five truly random words), not cute phrases with predictable substitutions.
-
Prefer WPA3-Personal (SAE) with Protected Management Frames (PMF) enabled; disable WPS.
-
Unique SSIDs. Avoid common SSIDs (e.g., “linksys”) that attackers precompute against; changing SSID alone doesn’t secure you, but it thwarts some precomputation tables.
-
Rotate defaults immediately. Never keep the ISP/router default key; store the new one in a password manager.
-
Consider 802.1X (Enterprise). If you manage many users/devices, move to per-user credentials instead of a shared PSK.
What we’re not doing here
We’re not providing cracking commands, wordlist links, or step-by-step attack guidance. That would enable misuse. If you’re performing a legitimate internal audit, follow your organization’s testing policy, keep full authorization on file, and use vetted tooling in a controlled lab.
Bottom line: Capturing a handshake only creates the possibility of offline verification; it doesn’t expose the password. Strong, long passphrases and modern protocols (WPA3 + PMF, or 802.1X) make offline guessing impractical—and that’s the outcome you want.
Checkpoint: you proved the risk in your own lab—now lock it down
First, drop the fireworks. You didn’t “hack Wi-Fi”; you demonstrated that a weak WPA/WPA2-Personal passphrase can be guessed offline from a captured handshake—on a network you’re authorized to test. That’s the point of the exercise.
What an attacker could (and couldn’t) see—reality check
The handshake isn’t the password. It’s a cryptographic exchange that lets someone verify guesses offline.
Traffic visibility depends on encryption. If an attacker later learns your PSK and also captures a fresh handshake for a device, they can decrypt that device’s subsequent Wi-Fi traffic. But proper HTTPS/TLS still protects your logins and banking data at the application layer. Plain-HTTP sites and misconfigured mail apps remain vulnerable.
Conclusion: weak PSKs + legacy settings = unnecessary risk.
Your immediate hardening plan
Move to WPA3-Personal (SAE) with Protected Management Frames (PMF) enabled. If you must stay on WPA2, force CCMP/AES only (no TKIP).
Use a strong PSK: 16–24 random characters (or 4–5 truly random words). Store it in a password manager.
Disable WPS and any “push-button” pairing features.
Isolate guests and IoT on a separate SSID/VLAN with client isolation.
Update firmware and enable auto-updates on the router/AP.
Lock down admin access: change the default admin password, disable remote management, and require HTTPS for the router UI.
Prefer HTTPS everywhere on client devices (enable “HTTPS-Only”/“Secure DNS” modes in browsers).
Rotate the PSK after staff/household changes or device loss.
No network is “unhackable.” Your goal is to raise the cost high enough that offline guessing isn’t practical and on-path decryption gains nothing.
Next section: a step-by-step guide to configuring WPA3/PMF, disabling WPS, choosing a strong PSK policy, and segmenting guest/IoT traffic—so your home/office Wi-Fi is resilient against the exact weakness you just proved.
6) Securing Your Network From The Aforementioned Attacks. (WiFi Password Hacking for Beginners)
Secure Your Wi-Fi: what to use (and what to retire)
Goal: make offline guessing impractical, stop drive-by abuse, and contain damage if a device is compromised.
Principle: No network is “unhackable.” We raise the cost until it isn’t worth the effort.
WEP — decommission immediately
What it is: 1990s-era RC4 + broken integrity.
Why it fails: small IV space, keystream reuse, predictable RC4, attacks work regardless of password “strength.”
Action:
-
Do not use WEP for any reason. If an ancient device “needs” WEP, replace the device. Period.
WPA / WPA2 — still common, but configure them correctly
What they are: WPA introduced TKIP (stopgap). WPA2 standardized CCMP/AES, which is what you want.
Two real-world failure paths & the fixes:
-
WPS (Wi-Fi Protected Setup) enabled
-
Problem: 8-digit PIN design + past implementation flaws make it a weak side door to the PSK.
-
Fix: Disable WPS (PIN and push-button). Don’t rely on “lock after N tries”; just turn it off.
-
-
Offline guessing against WPA/WPA2-Personal (PSK)
-
Problem: If someone records a valid 4-way handshake, they can try password guesses offline. Weak/short PSKs fall.
-
Fixes:
-
Use WPA2-Personal (CCMP/AES only) — disable TKIP and any “WPA/WPA2 mixed mode.”
-
Passphrase policy: 16–24 random characters (or 4–5 truly random words). Store in a password manager.
-
Unique SSID helps: avoid ultra-common SSIDs that appear in precomputed lists.
-
Enable PMF (802.11w) if your AP allows it under WPA2; it protects management frames and blocks many nuisance tricks.
-
-
Bonus (business-grade gear): consider per-device PSKs (PPSK/DPPSK). Compromise of one device doesn’t expose everyone.
WPA3-Personal (SAE) — preferred
What it is: Simultaneous Authentication of Equals (Dragonfly), designed to resist offline guessing.
How to deploy:
-
Set SSID security to WPA3-Personal with PMF required.
-
If you have legacy clients, use WPA2/WPA3 Transition Mode temporarily—but plan a sunset date.
-
Keep firmware current (SAE had early “Dragonblood” issues years ago; modern firmware is patched).
Enterprise option (best for offices & schools)
WPA2/WPA3-Enterprise (802.1X) with per-user auth (ideally EAP-TLS certificates) eliminates the shared secret problem entirely.
When to choose: multiple users/devices, staff turnover, compliance needs.
Side benefit: revoke one user without touching everyone else.
Security settings checklist (apply these now)
-
Encryption: WPA3-Personal + PMF. If not possible, WPA2-Personal (AES only) + PMF if available.
-
WPS: Off.
-
PSK: 16–24 chars (random) or long truly random word phrase. Rotate after turnover/device loss.
-
Guest & IoT: separate SSIDs/VLANs with client isolation (guests can’t talk to each other or your LAN).
-
Admin plane: change router admin password, disable remote management, require HTTPS, restrict management to a trusted VLAN/IP.
-
Firmware: enable auto-updates on AP/router.
-
Channels/Bands: prefer 5 GHz/6 GHz (less interference), choose legal non-overlapping channels; avoid 2.4 GHz unless needed.
-
Legacy modes: disable 802.11b and TKIP; don’t broadcast “open” or WEP SSIDs for any reason.
-
Monitoring: review AP logs periodically; set alerts for new/rogue APs if your gear supports it.
-
Backups: export your AP config after you harden it; store it safely.
Quick “good/better/best”
-
Good: WPA2-Personal (AES only), WPS off, 20-char random PSK, guest isolation.
-
Better: add PMF, split IoT/guest VLANs, auto-updates, admin plane locked down.
-
Best: WPA3-Personal (home) or WPA2/3-Enterprise with EAP-TLS (orgs), PMF required, PPSK/DPPSK for shared devices, network segmentation everywhere.
Lock it in, document it, back it up—then move on knowing your Wi-Fi isn’t the low-hanging fruit anymore.
7) Conclusion Make your Wi-Fi a hard target
You’ve seen how weak configurations invite trouble; now lock it down so offline guessing isn’t worth anyone’s time.
-
Retire WEP forever. It’s broken by design. There’s no “secure WEP” setting—just don’t use it.
-
Prefer WPA3-Personal (SAE) with PMF required. If you must stay on WPA2, force AES/CCMP only (no TKIP, no “mixed mode”).
-
Choose length over gimmicks. A 16–24-character random passphrase (or 4–5 truly random words) beats cute complexity rules. Store it in a password manager.
-
Turn WPS off. PIN and push-button alike. It’s a side door to your PSK—close it.
-
Segment guests & IoT. Separate SSIDs/VLANs with client isolation so toys and visitors can’t reach your LAN.
-
Harden the admin plane. Change the router’s admin password, disable remote management, use HTTPS for the UI, and keep firmware auto-updated.
Bottom line: No network is “unhackable,” but these settings raise the cost so high that casual attacks and offline guessing aren’t practical. Do the basics well, document them, back up your config—and your Wi-Fi stops being the easy target on the block.
Related Videos:

Related Posts:
Staying Safe on Public WiFi: Essential Tips and Best Practice
Explosive Candlelight Concerts Oakville reviews: 7 Reasons to Attend
Leadership in Virtual Job Interviews: 8 Proven Ways
Astonishing Figure 02 humanoid robot at BMW: 400% faster (2025)
Python Essentials: A Beginner’s Guide to Coding with Python
Python Online Compiler Code on the Go
“Keep WiFi on during sleep” setting for Chromebooks
SEO for Beginners: Navigating the World of Search Engines – Lesson 1.1


